

Chandeliers are the epitome of elegance in any room, but sometimes, they need adjustments to fit perfectly in your space. One such adjustment is cutting the chandelier chain. Whether you're installing a new chandelier or making some tweaks to an existing one, knowing how to cut a chandelier chain safely and correctly is crucial for both aesthetic and functional purposes. In this article, we’ll guide you through the process, step by step, ensuring a safe and clean cut.
Why You Might Need to Cut a Chandelier Chain
Before diving into the details of the process, let's first understand why you might need to cut a chandelier chain:
- Height Adjustment: If your chandelier is hanging too low, shortening the chain can bring it to the desired level, offering a better visual balance in the room.
- Aesthetic Appeal: Cutting the chain can also ensure that your chandelier complements the overall design and style of the room.
- Installation Requirements: In some cases, the chain length might simply be too long for your space, and a trim is necessary for practical reasons.
Now that we know the "why," let's move on to the "how."
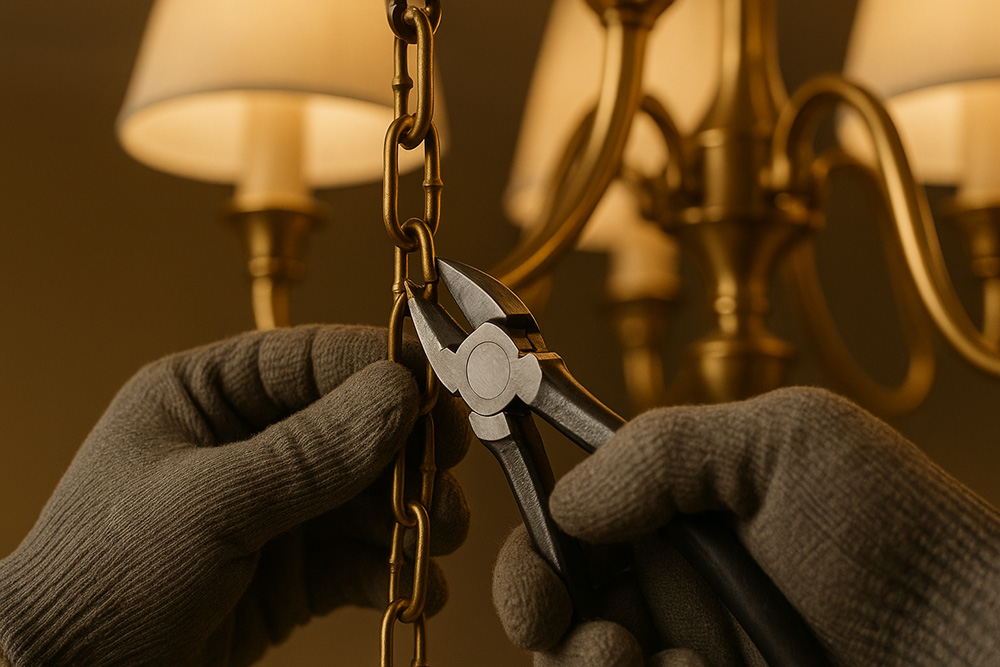
Tools You'll Need
Before you begin, gather these tools to ensure a smooth and successful process:
- Measuring Tape: To accurately measure the desired length of the chain.
- Chain Cutters or Wire Cutters: These will help you make clean cuts.
- Pliers: Used to close any open links after cutting.
- Safety Gloves: To protect your hands from sharp edges and debris.
- Ladder or Step Stool: To reach the chandelier easily and safely.
- Safety Glasses: To protect your eyes from falling chain links or debris.
Step-by-Step Guide
1. Turn Off the Power
Safety First: Before doing any work, make sure to turn off the power at the circuit breaker to avoid electrical hazards. Even if you're only adjusting the chain, it's crucial to ensure that no power is running to the chandelier while you work.
2. Measure the Desired Length
Use a Measuring Tape: Carefully measure how much of the chain you want to cut. Ideally, measure from the point where the chain connects to the ceiling to where you want the chandelier to hang.
Mark the Chain: Once you have your measurements, mark the spot on the chain where you’ll cut it. Double-check your measurements to avoid mistakes.
3. Remove the Chandelier (If Necessary)
Disassemble for Safety: If the chandelier is heavy or you're not comfortable cutting the chain while it's still hanging, it’s a good idea to remove it from the ceiling. This step is especially important if you plan on cutting multiple links, as it gives you more control over the process.
4. Cut the Chain
Position the Chain: Secure the chain in place or hold it firmly with one hand while using the other hand to cut the links. Use your chain cutters or wire cutters to cut the chain at the marked spot. It’s important to cut through one link at a time to ensure you don't damage the chain or chandelier.
Use Pliers for Final Adjustments: After cutting the chain, use pliers to ensure that any open links are properly closed. This will prevent any loose ends that could cause issues when the chandelier is re-hung.
5. Reinstall the Chandelier
Reattach the Chain: Once the chain is cut and adjusted, carefully rehang the chandelier, ensuring it’s secure and level. Double-check that the new chain length suits the room and that the chandelier is hanging at the correct height.
Restore Power: Once the chandelier is properly hung, turn the power back on at the circuit breaker and test the chandelier to ensure everything is functioning properly.
Tips for a Professional Finish
- Clean the Chain: After cutting, wipe down the chain to remove any debris or metal dust that may have accumulated during the process.
- Keep Extra Links: If you're unsure about the length, it’s a good idea to keep a few extra links, as you can always shorten the chain further but can’t add more once it’s cut.
- Use a Chain with the Right Gauge: Make sure you’re using a chain of the appropriate gauge and strength for the chandelier's weight. If in doubt, consult the chandelier’s manual or a professional.
Conclusion
Cutting a chandelier chain is a straightforward task that can greatly enhance the look and function of your lighting. With the right tools, careful measurements, and proper safety precautions, you can easily adjust the chain to fit your space and design preferences. Follow the steps outlined above to ensure a smooth and successful modification.
By taking the time to make these adjustments, you’ll not only improve the aesthetic appeal of your room but also ensure the chandelier’s functionality and safety. Happy decorating!
